| Having trouble reading this email? Click here to view online. |
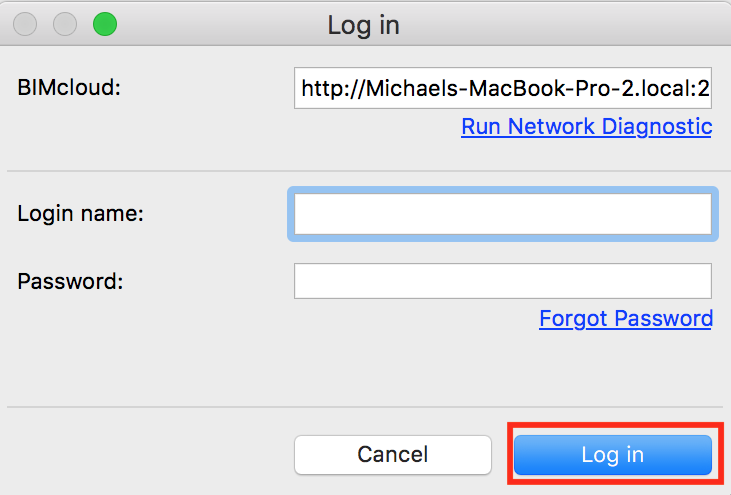
Tips and Tricks Edition 47: BIMserver Library Library Management is a tricky subject. In a previous Tips and Tricks we showed you how to use ARCHICAD to create your own library container files. In this Tip and Trick we’ll expand on this theme to show you how to use the BIMserver, now the BIMcloud Server to manage libraries in a company – even for solo projects! In larger companies, it’s common practice to store your ARCHICAD libraries on a server. This workflow allows the manager to keep the company library consolidated and given them the flexibility to update it easily. However, this workflow can also cause considerable delays when opening files as the entire library must traverse the network from its source – the server, to its destination – the users’ machine. Couple this with any project file which can be gigabytes in size and users may be waiting considerable lengths of time to open a project! By using BIMcloud to manage libraries, we can still keep the preferred workflow, but ARCHICAD will keep a local cache (copy) of the library on the users machine so the majority of the data is stored locally. The workflow will use GRAPHISOFT’s Delta Technology to push only the changes to the library to the end user, so the amount of data which needs to traverse the network is only what’s changed to the library structure and not the library itself. First, we must have BIMcloud, BIMcloud Basic, or BIMserver installed. Part 1. Load a Library to The BIMcloud Server – this part should be done by the person designated to maintain libraries in your office.1. Click File > Libraries and Objects > Manage BIMcloud Libraries
2. Log in with your Login Name and Password as setup in the BIMcloud users. Click Log In
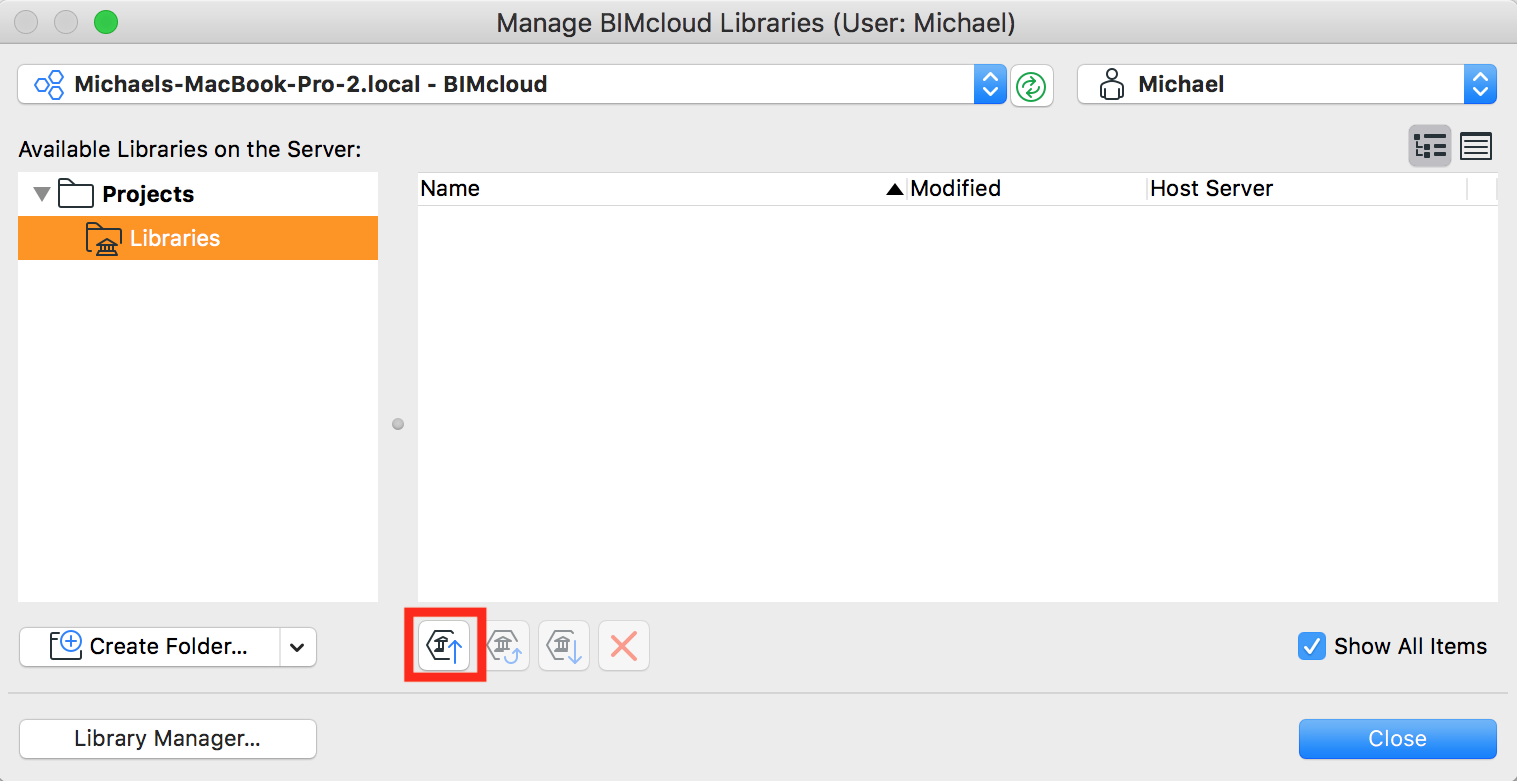
3. Click the Upload a Local Library to the BIMcloud button
4. Locate the library you want to upload in the Finder/Explorer window. Click Choose to upload the selected folder to the BIMCloud Server.
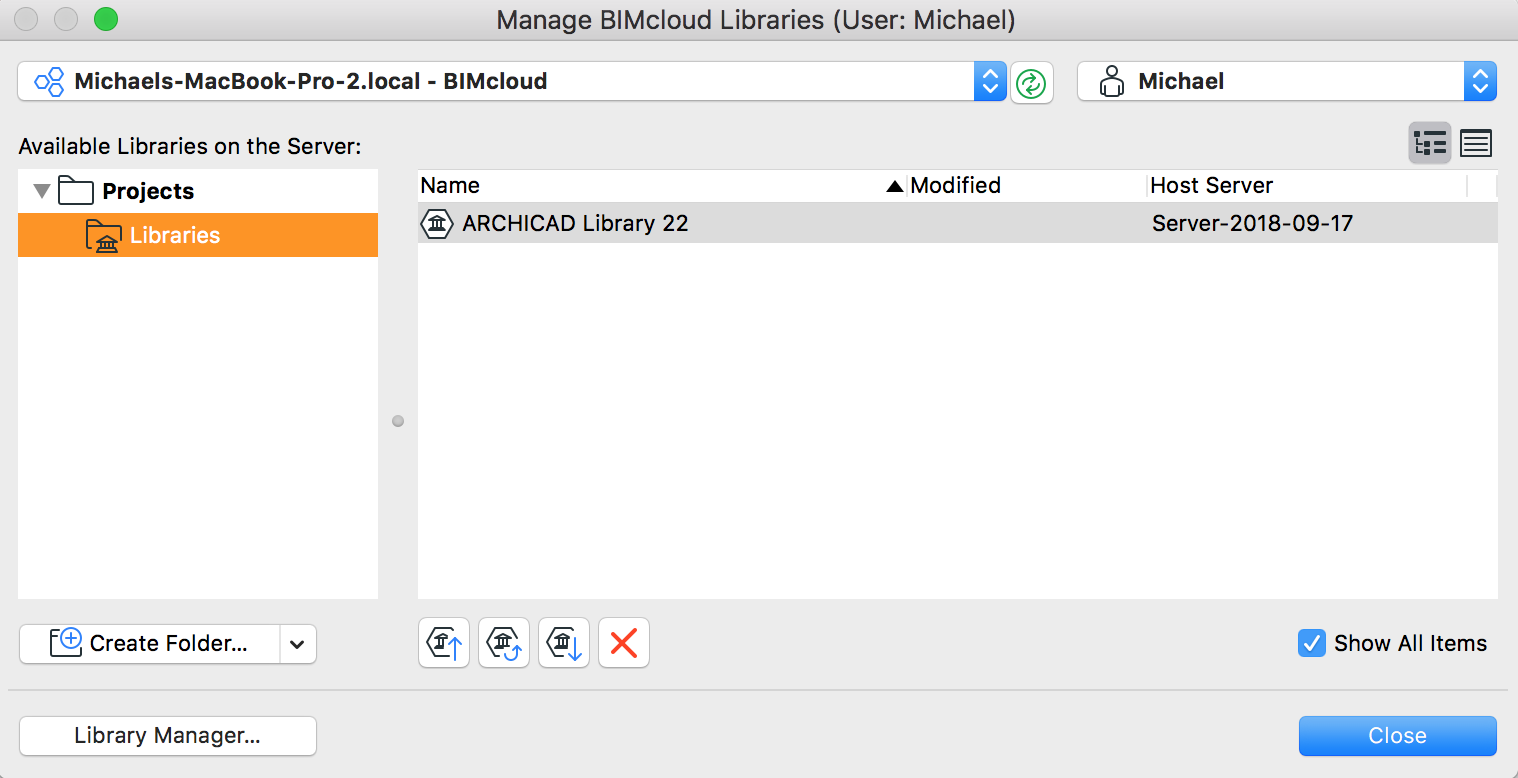
5. Your loaded libraries will appear in the dialog. If you select one of them you have options to update the selected item from a local copy, download it or delete it.
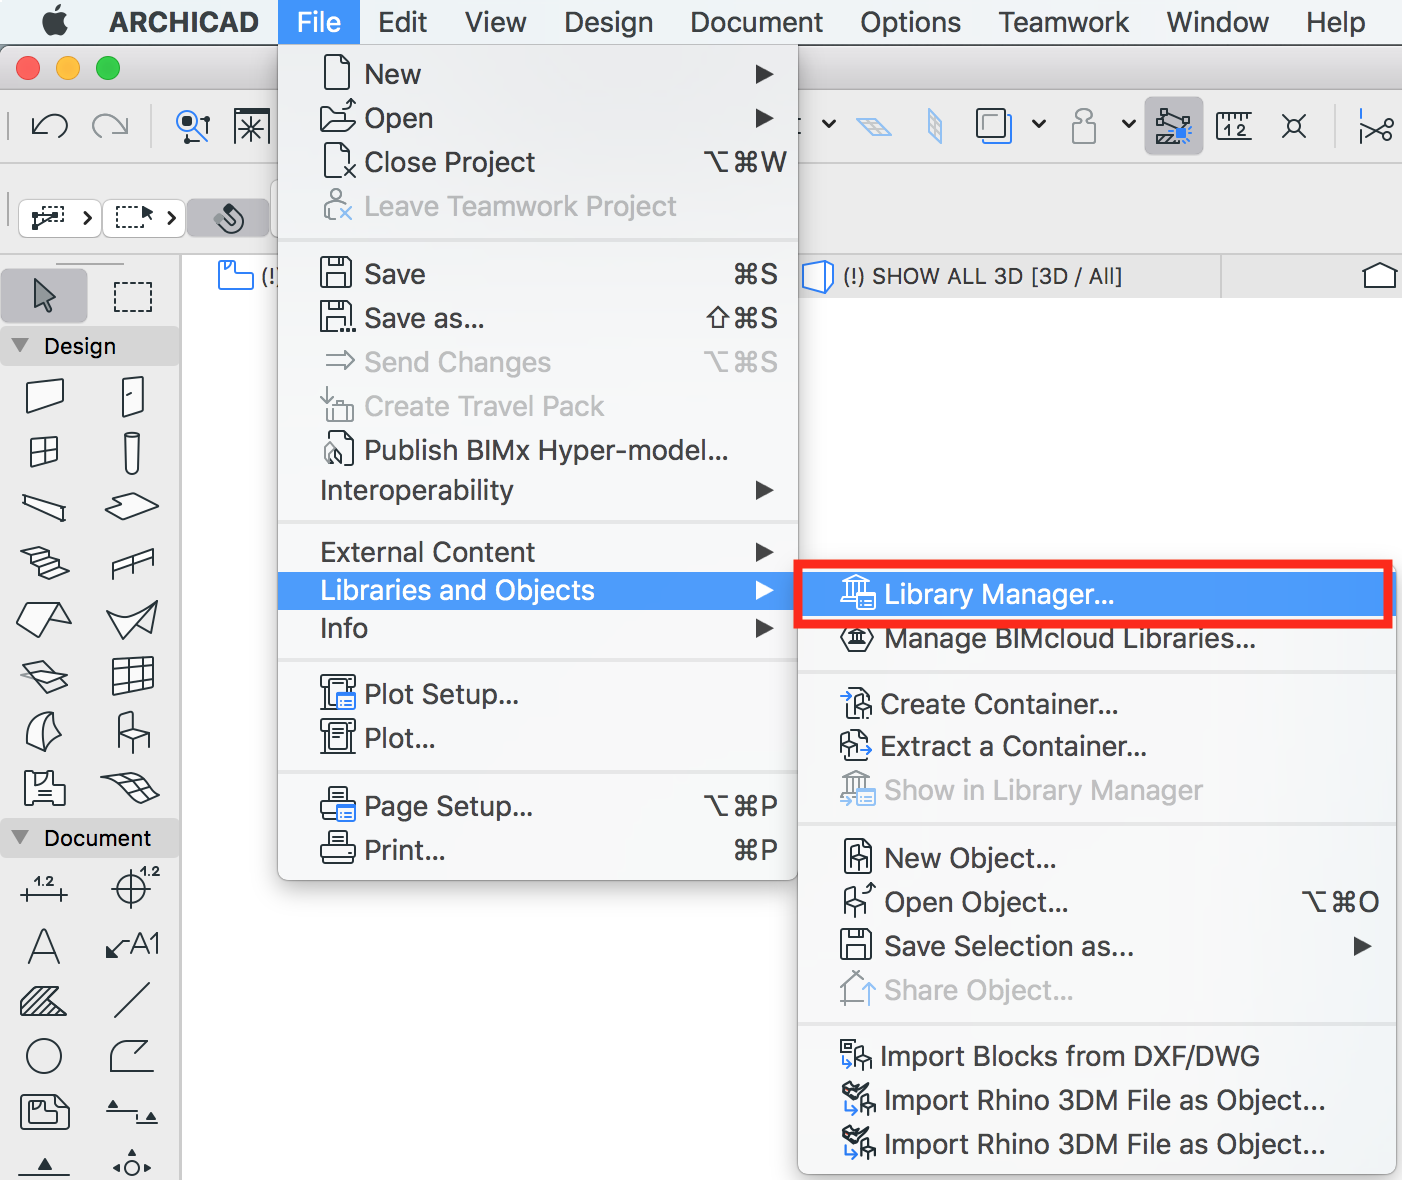
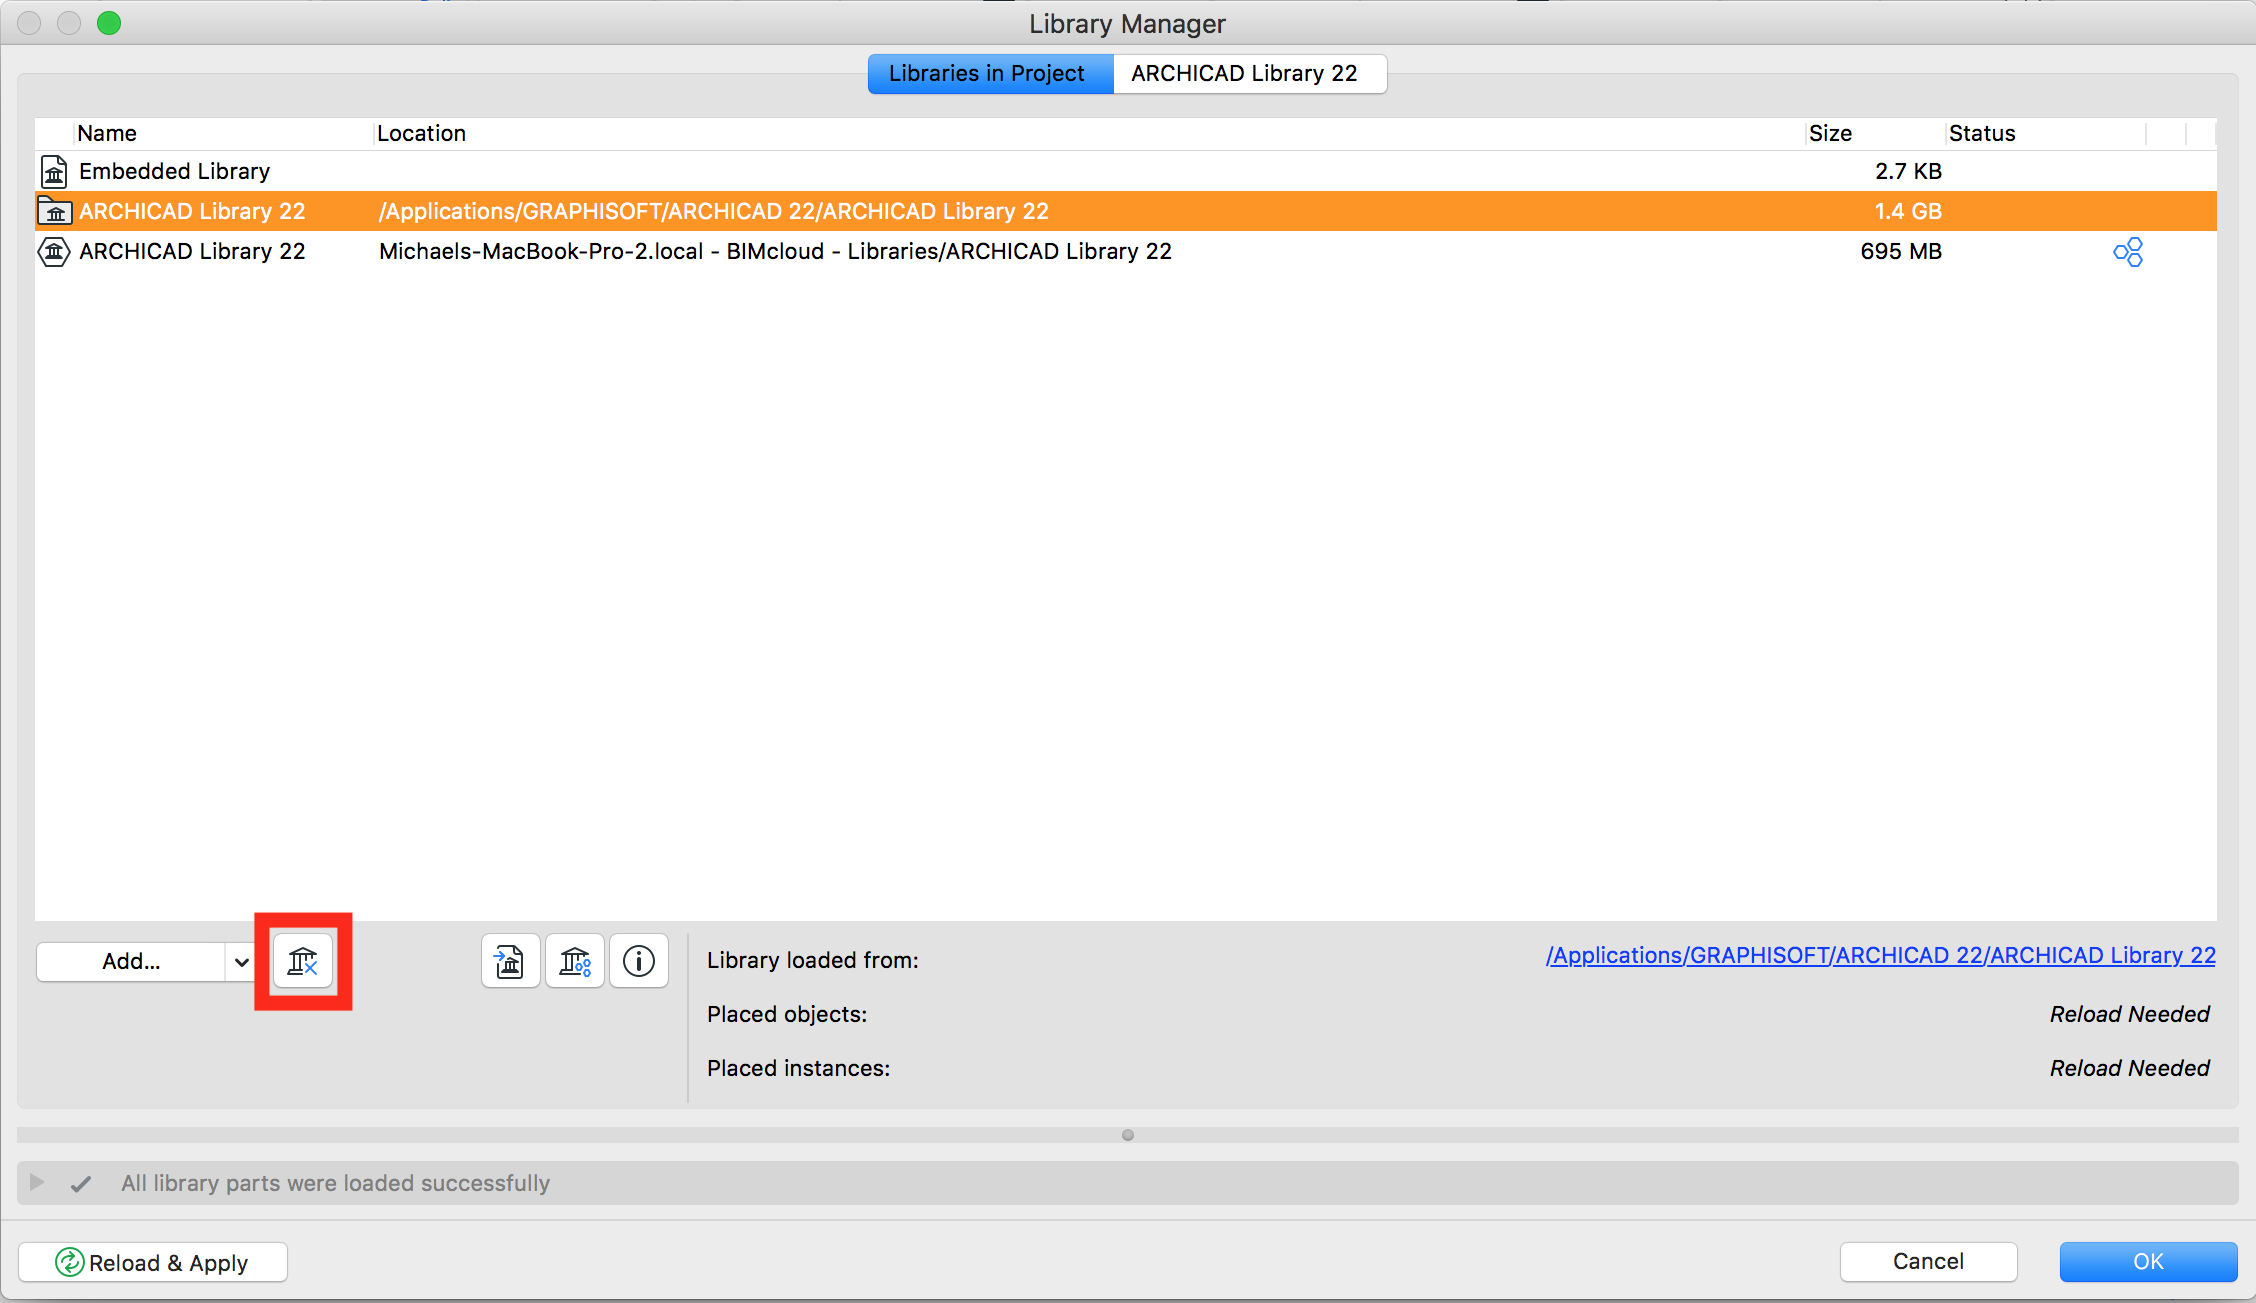
6. Click Close to return to ARCHICAD. Part 2. Implement a BIMcloud library into the project.7. Click File > Libraries and Objects > Library Manager
8. Click the drop down arrow to the right of the Add button and choose Add BIMcloud Library from the list
9. Click on the BIMcloud Library you want to add to your project then click Add
10. Back in the Library Manager Dialog, select the original instance of the library (If any) and remove it from the list
Part 3. Library Maintenance – this part should also be done by the person designated to maintain libraries in your office.11. Make some changes to the a library or folder containing library parts. 12. Repeat steps 1 and 2 to access the Manage BIMcloud Libraries Dialog. 13. Select the loaded library you wish to update. Rather than clicking Upload a local Library button, this time select the Update BIMcloud Library with a local Library
14. Navigate through to your folder and click Choose
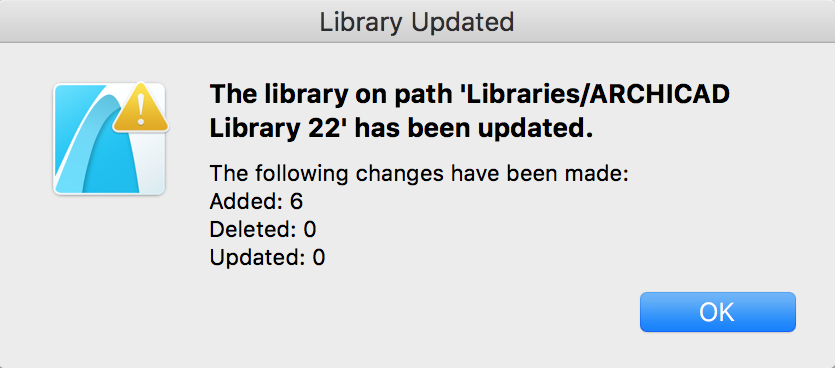
You’ll be notified when the library has finished updating.
Close out of the dialog by clicking OK to return to ARCHICAD. Local users will also be prompted to reload libraries to get their latest versions. Only the changes will be pushed.
|