AUS 1300 423 372 | NZ 0800 900 889
$0.00 0

Cart

No products in the cart.

Latest offers MyCi login My account

Creating Part File Out of Toolbox

November 4, 2024
Home » Resources » Tips & Tricks » Creating Part File Out of Toolbox

Creating Part File Out of Toolbox

When you create a custom part by copying a toolbox part usually the part file is still managed by toolbox. Furthermore, you many want to have the ability to get revision control. This can be achieved using the sldsetdocprop.exe tool.

Steps:1 Go to your SOLIDWORKS install folder on your machine C:\program files\solidworks corp\solidworks\toolbox\data utilities\
 

Step 2: Run the sldsetdocprop.exe file

Step 3: Add files/ folders that you want to change

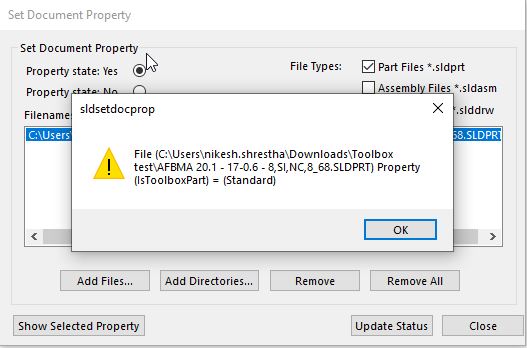
Step 4: By default, Property state is set to “Yes”, click Show Selected Property to view the status

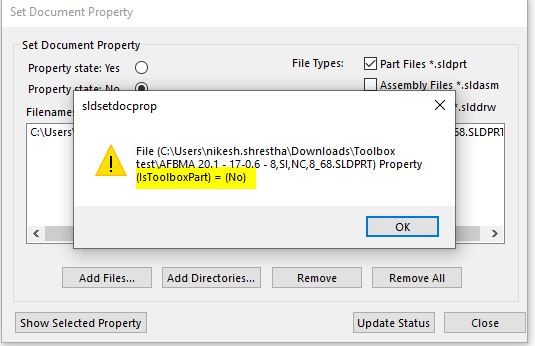
Step5: Now, set Property State to “ No” and click “Update Status” and click “Show selected Property to check the status. Also in the Assembly file you will not see toolbox icon in the Feature Manager tree anymore.

Now, you should be able to Check in the part file into PDM vault like any other part.     

Enquire now

The best solution is the one tailored to your needs. Complete the form below and our friendly team will be in touch.
This field is hidden when viewing the form

Enquire today

The best solution is the one tailored to your needs. Complete the form below and our friendly team will be in touch.
This field is hidden when viewing the form

Contact us

The best solution is the one tailored to your needs. Complete the form below and our friendly team will be in touch.
This field is hidden when viewing the form