AUS 1300 423 372 | NZ 0800 900 889
$0.00 0

Cart

No products in the cart.

Latest offers MyCi login My account

How to Create and Position Holes on a Non-planar Solid Face

December 9, 2024
Home » Resources » Tips & Tricks » How to Create and Position Holes on a Non-planar Solid Face

How to Create and Position Holes on a Non-planar Solid Face

Hole Wizard is a great and handy tool in Solidworks that reduces the burden of creating standard holes of various types.

This blog specifically shows how to create holes on non-planar solid faces and control its position using a 3D sketch environment. Without further ado, below are the steps:

1. On the Features tab click Hole Wizard   (Features toolbar) or Insert > Features > Hole > Wizard, set the PropertyManager options, and click  :


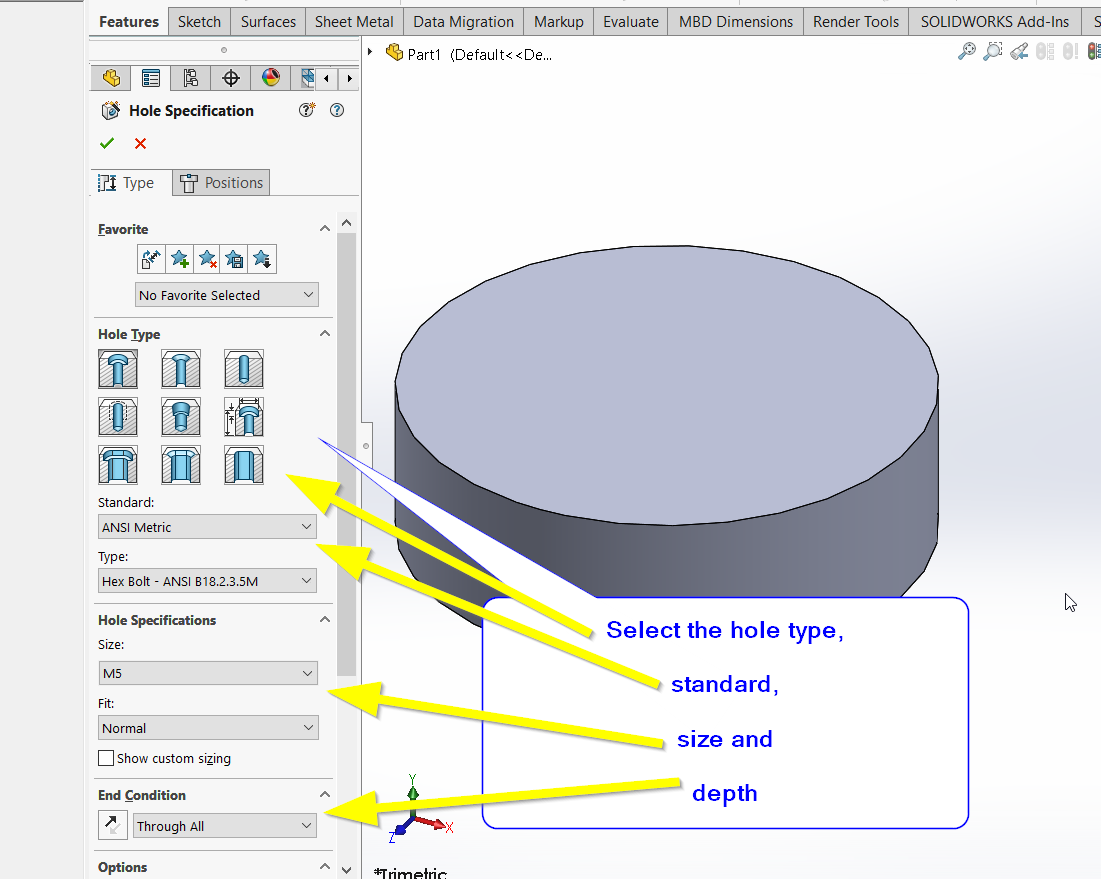
2. Set the hole type and its parameters:
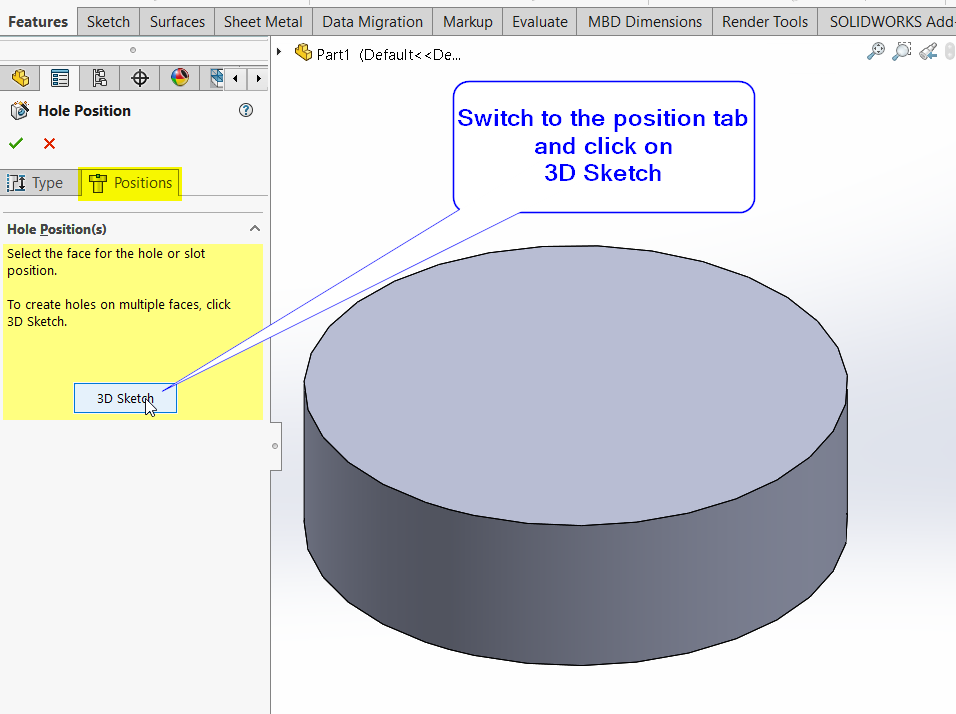
3. Switch to the Positions tab and click on 3D sketch to place the hole on the cylindrical face (representing the non-planar face here):
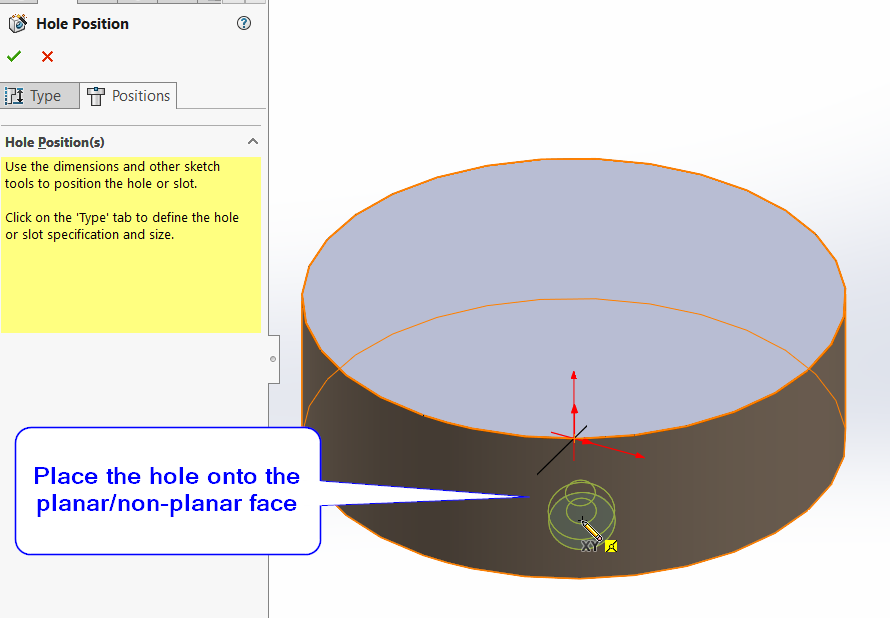
4. Click the face the place a Point representing the center of the hole:
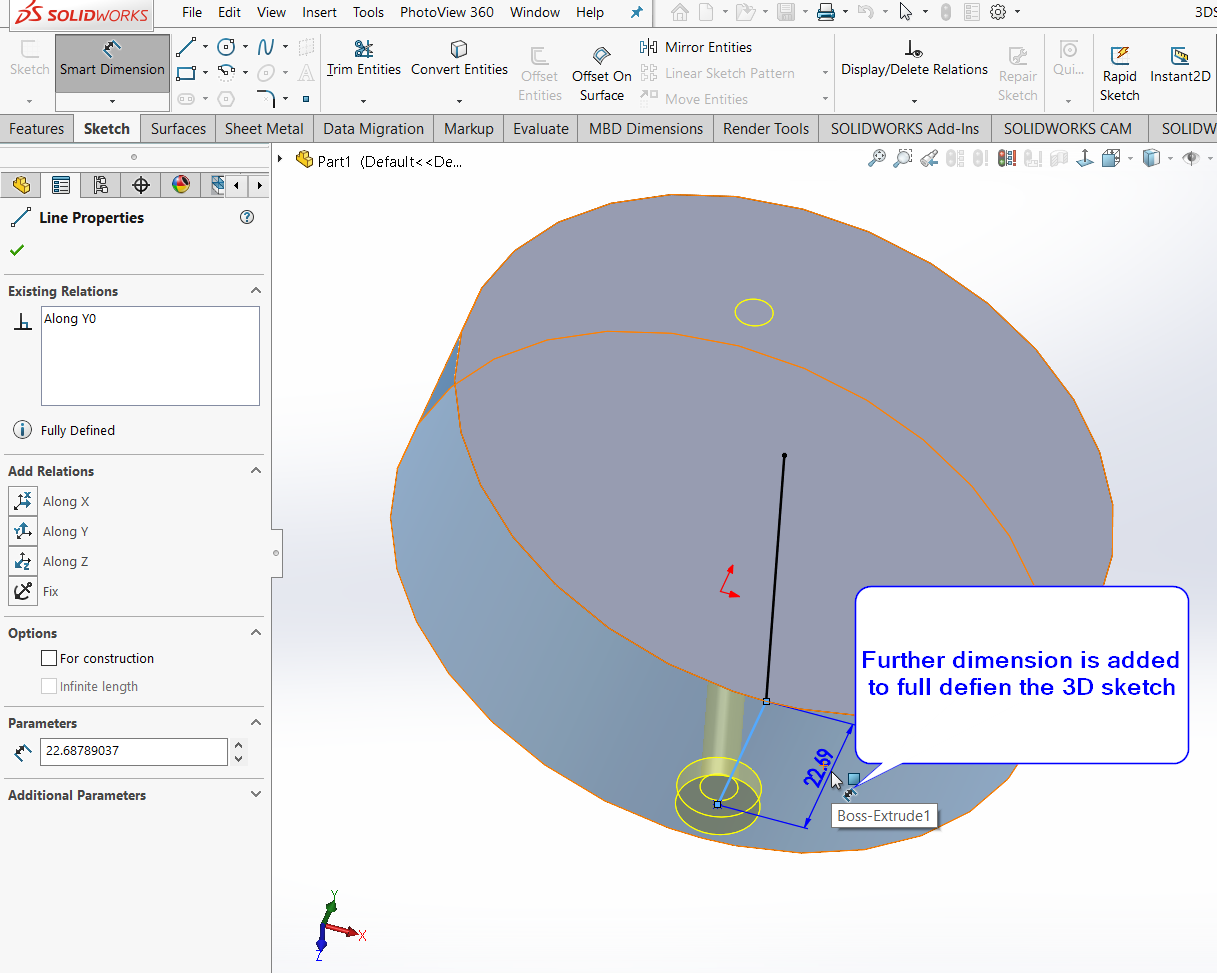
5. The center of the hole can be constrained using lines, dimensions, and relations. This is due to being in 3D sketch mode:


Click OK  once the 3D sketch is fully defined, indicated at the status bar.

Enquire now

The best solution is the one tailored to your needs. Complete the form below and our friendly team will be in touch.
This field is hidden when viewing the form

Enquire today

This field is hidden when viewing the form

Contact us

The best solution is the one tailored to your needs. Complete the form below and our friendly team will be in touch.
This field is hidden when viewing the form