Insert Toolbox items
Tips and Tricks • Marketing • 6 April 2016
Hi there,
Today I would like to talk about a simple feature in the toolbox that a lot of users do not know about.
This is to insert toolbox items into an assembly.
This is handy when you wish use a specific series of bolts for a set of holes.
You can then change the bolt accordingly.
To use this feature, you will have to be in the Assembly environment.

Next, select the edge of where you wish to insert the bolts to

Use Ctrl Select to select multiple edges.
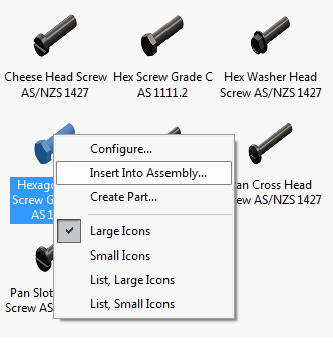
Once you have the holes selected, go to the Design library –> Toolbox–> the standard that you wish to use –> the bolt that you wish to use and right click on it .
Select Insert into Assembly

Once completed, you will see the preview of the Bolts in the graphics area
The settings are the same as per inserting a single toolbox item into the assembly

Select Ok to confirm.

I hope this helps.