Trouble Shooting Imported Bodies – Import Diagnostics
Tips and Tricks • Peter • 14 September 2017
Occasionally imported bodies can cause issues in SOLIDWORKS models, particularly in Large Assemblies and Simulation scenarios.
Those issues usually result in poor performance and instability in those scenarios, and can ultimately cause crashing/ file corruption/data loss.
It is critically important in those cases to ensure that imported geometry does not contain these types of problems.
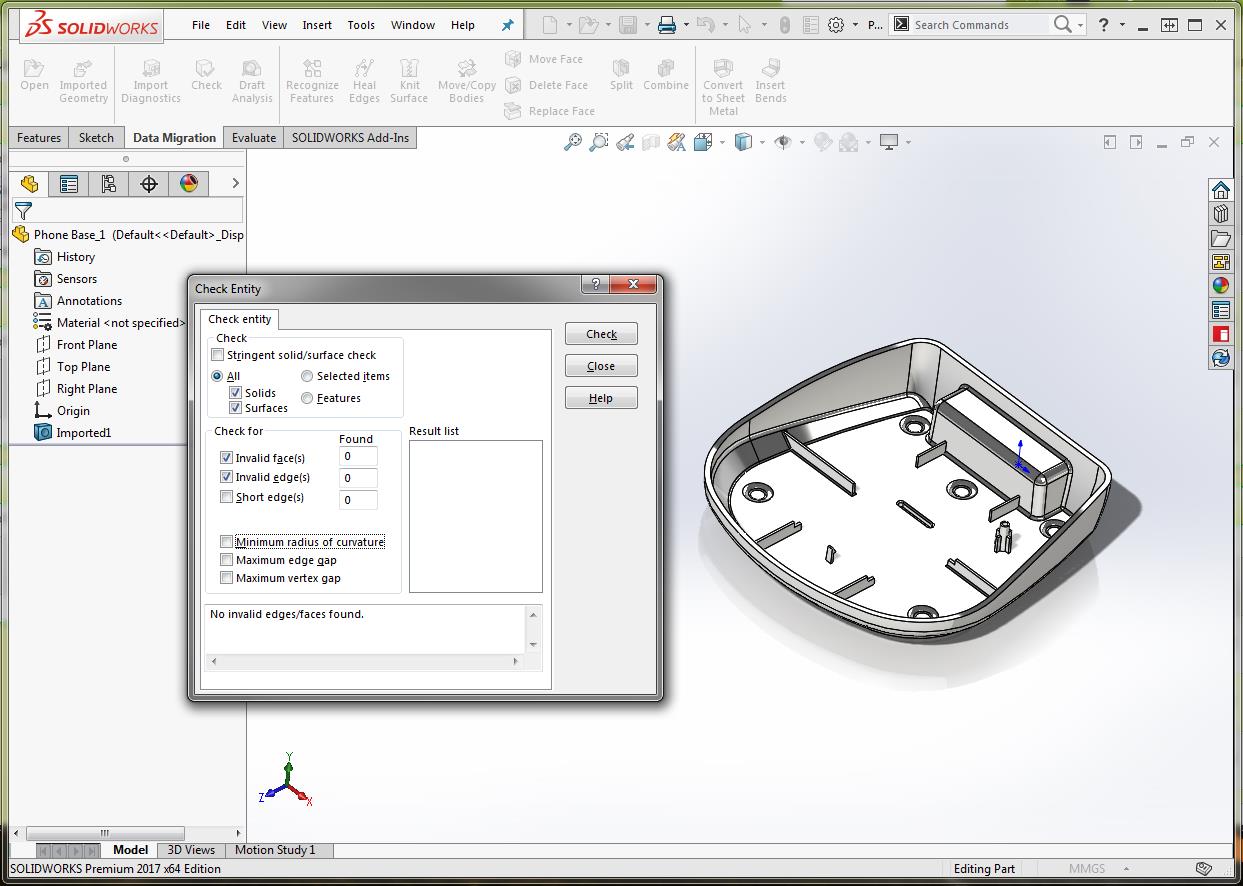
The issue with this is that the body as imported looks okay and Using the Tools>Evaluate>Check tool does not indicate any topology issues.
To trouble shoot this issue, we need to use Import Diagnostics, which will initiate under the following conditions:
- When you import a model with faults, a message asks if you want to run Import Diagnostics. Click Yes. ( Imported Assemblies will not show this warning, because import diagnostics works a the part level – you need to open the imported part body and run it manually)
- With a model open, click Import Diagnostics (Tools toolbar) or Tools > Evaluate > Import Diagnostics


 Import Diagnostics opens in the Property Manager Tab with a dialogue to identify ‘Faulty face issues’, and ‘Gaps between faces’.


If faults remain, after attempting to Heal all, you can right click on the Faulty face in the Analyze Problem dialogue to access other options:


Similar options are available for resolving remaining Gap issues.
A general guideline is to repair faulty faces first, and then attempt to repair gaps last.
Once all issues have been resolved the Import Diagnostics will indicate that the No Faulty Faces or gaps remain in the geometry.


For more details please refer to Import Diagnostics Overview in SOLIDWORKS Help: